Archives for April 2014

Knits That Breathe – Haven Project Particulars

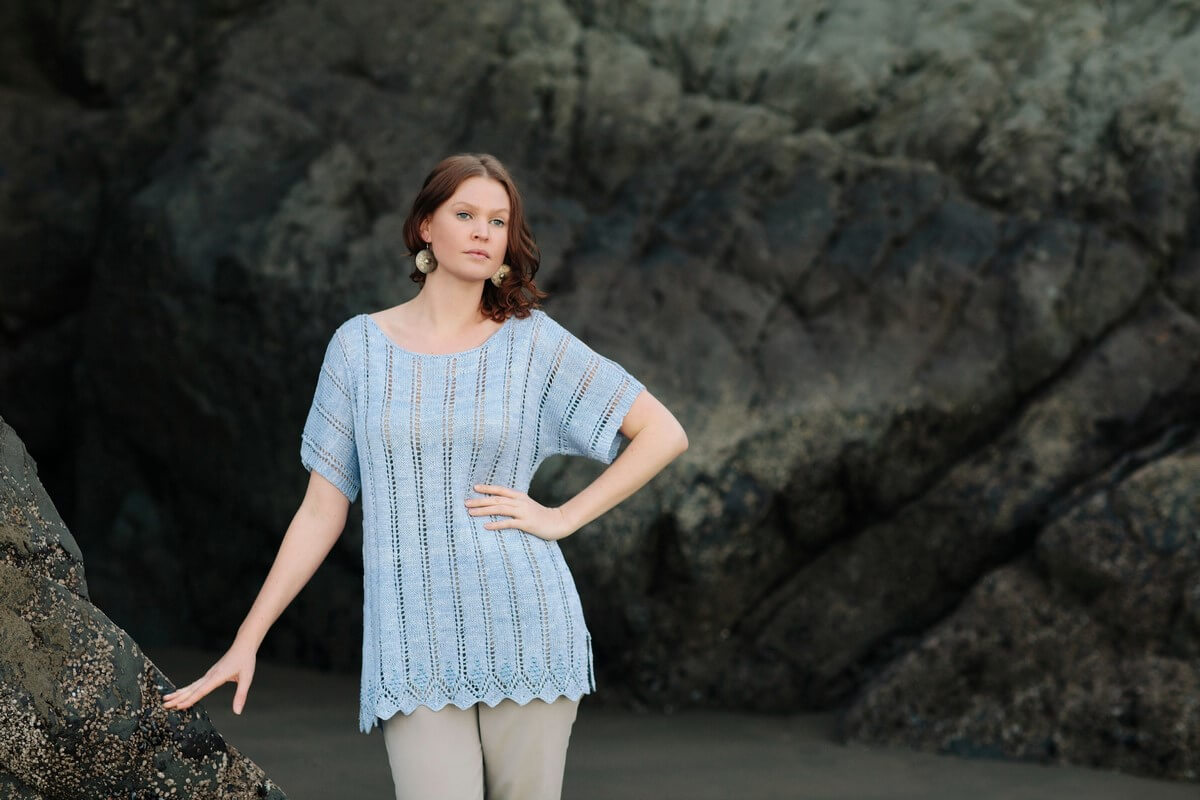
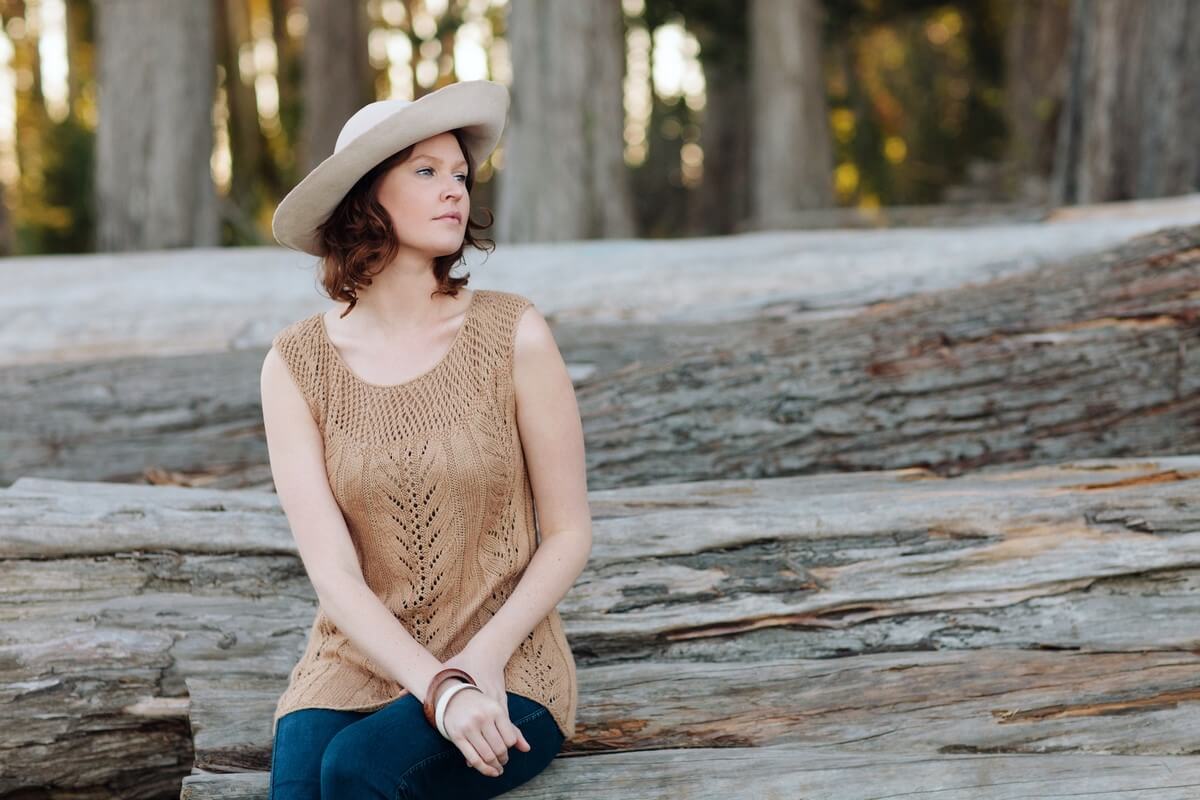
I designed Haven with multiple purposes in mind. There’s nothing like a “versatility challenge” to get me thinking, swatching, sketching, and swatching some more. One of the great things about living in Chicago is that in the summertime, several lakefront beaches are a mere 15-minute walk from my apartment. With a book and a cold drink in hand and my toes in the cool lake, I can’t think of a better way to laze away a weekend afternoon than on a sandy beach.

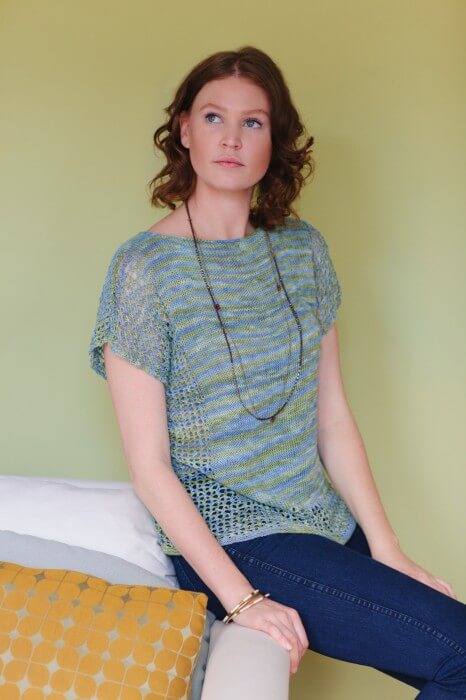
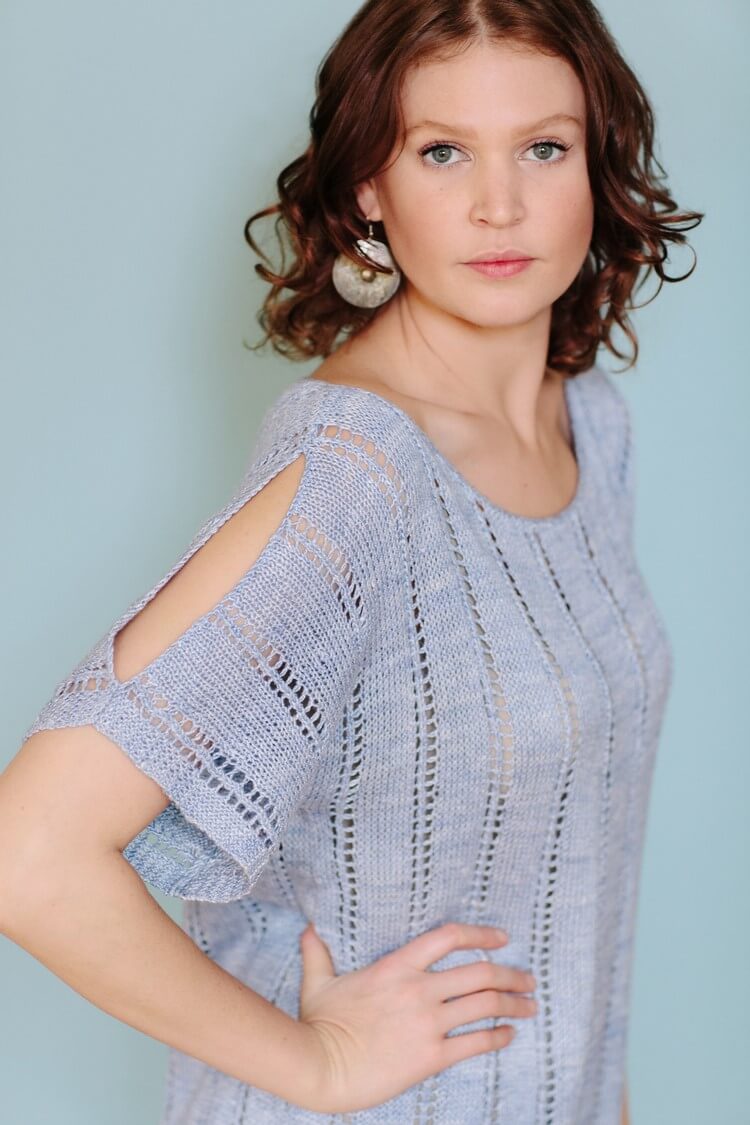
But it would feel a bit odd to me to stroll around downtown among the business professionals and the tourists without some kind of cover over my bathing suit. And if I can also wear that cover as a casual top, or an oversized, comfortable layer over a camisole, so much the better.

Haven 1 256_KnitsThatBreathe

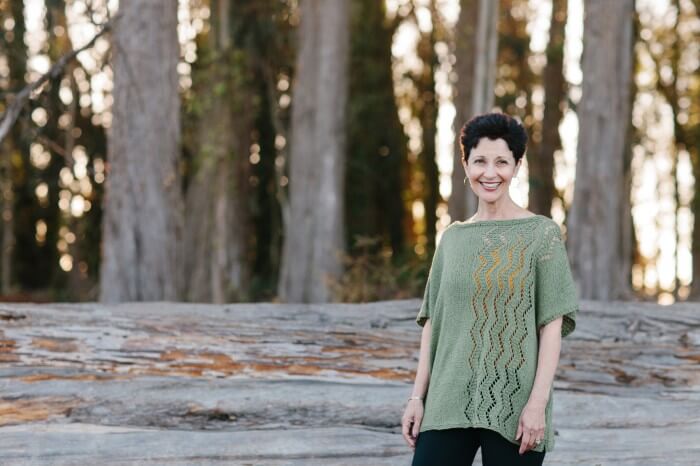
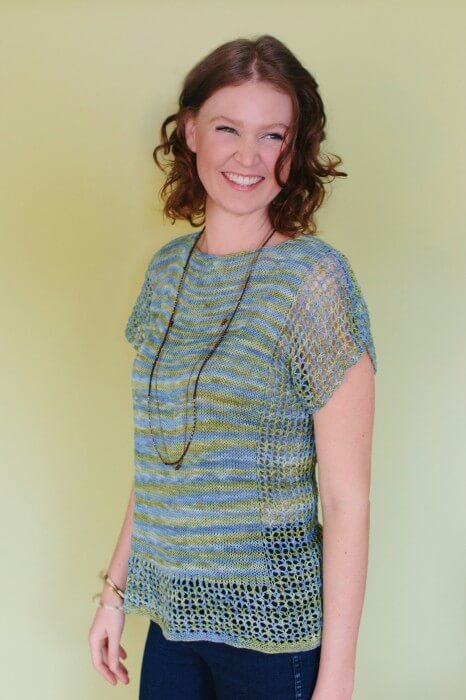
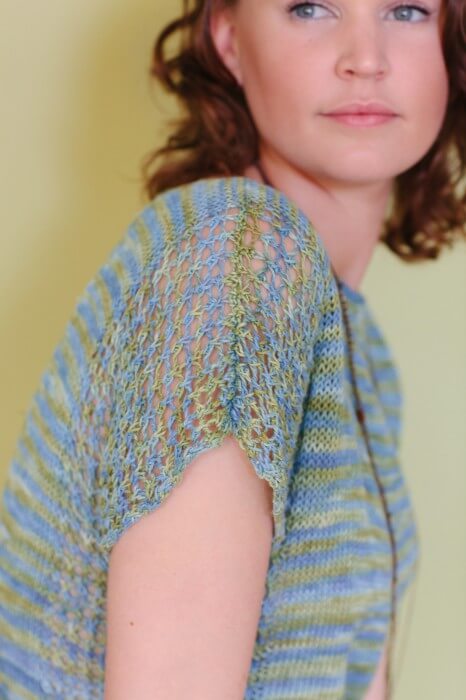
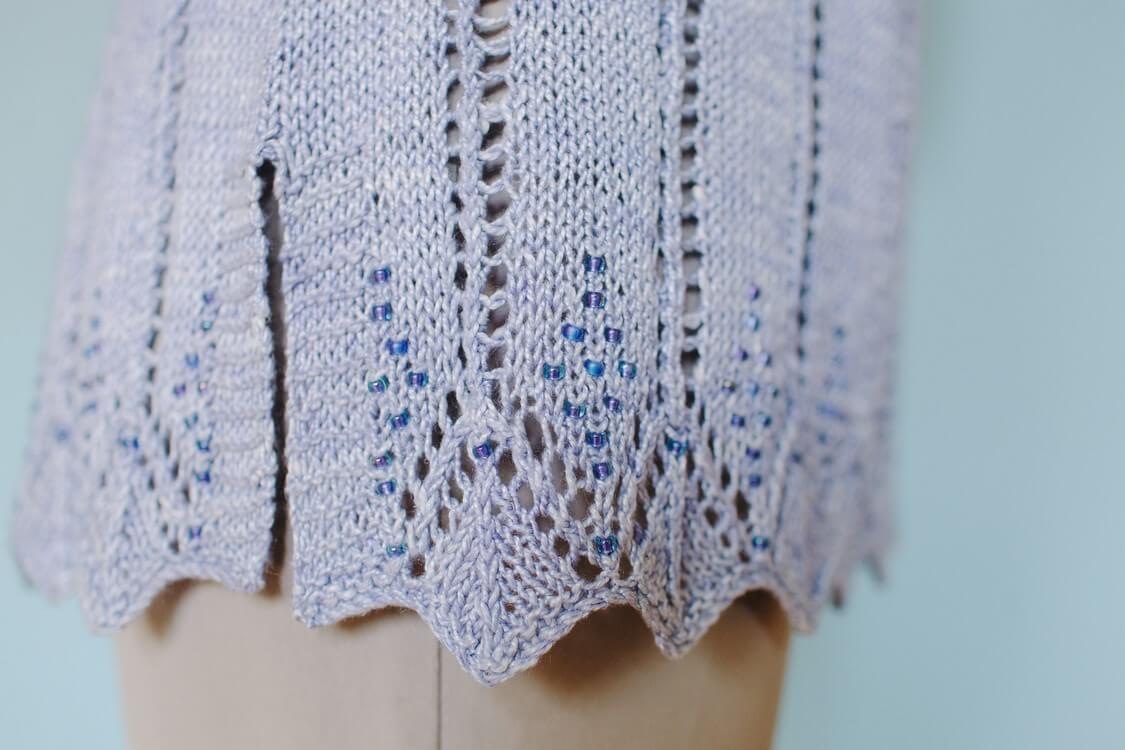
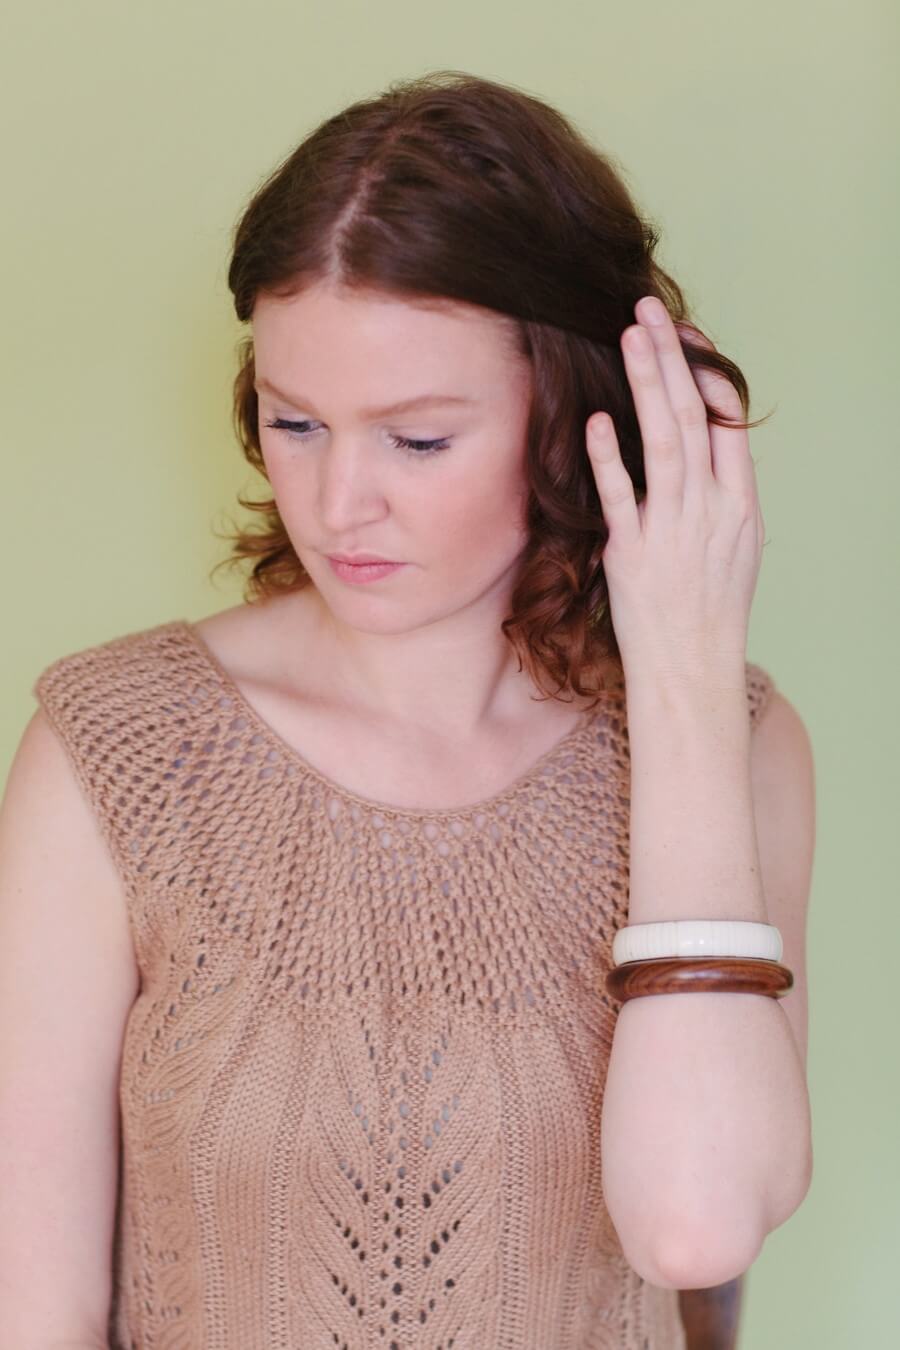
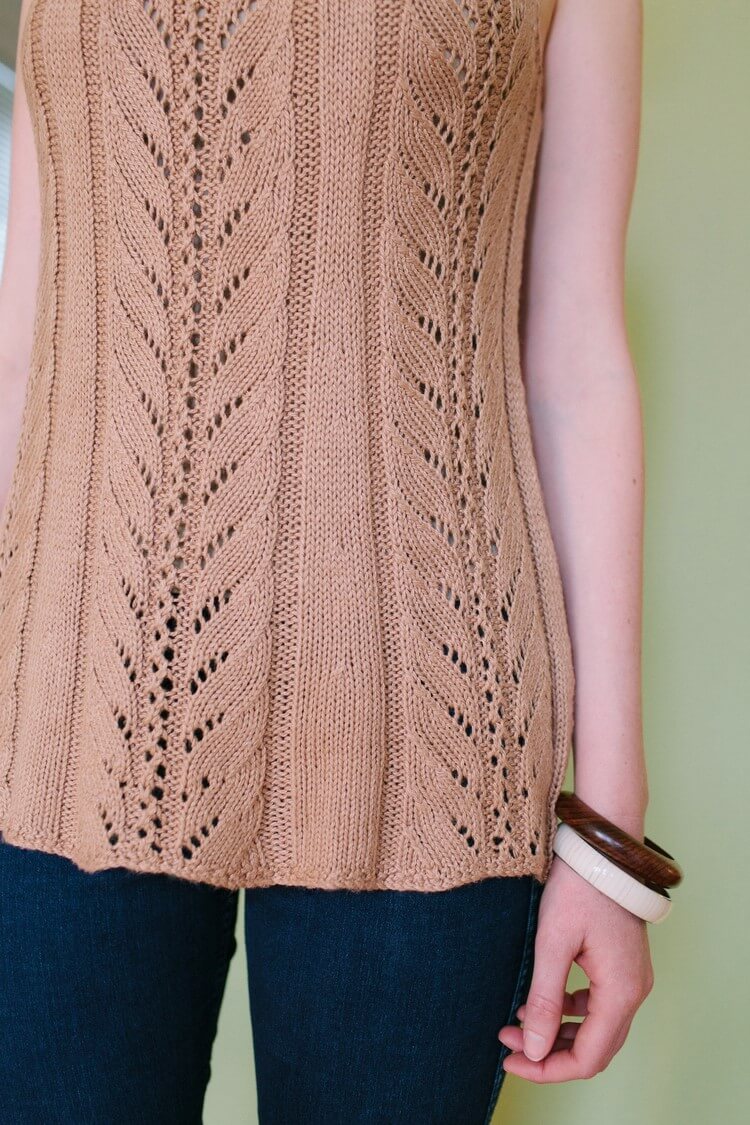
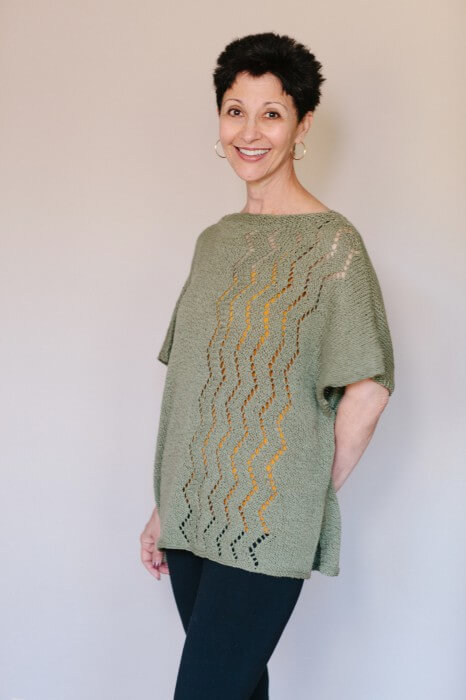
Haven began with a fetching zig-zag lace pattern in one of my Japanese stitch dictionaries. I was so taken with it that I swatched it ages ago, well before beginning the designs for Knits That Breathe. Ever since then, it has been pinned to my inspiration board where I could look at it every day until the right project came along.

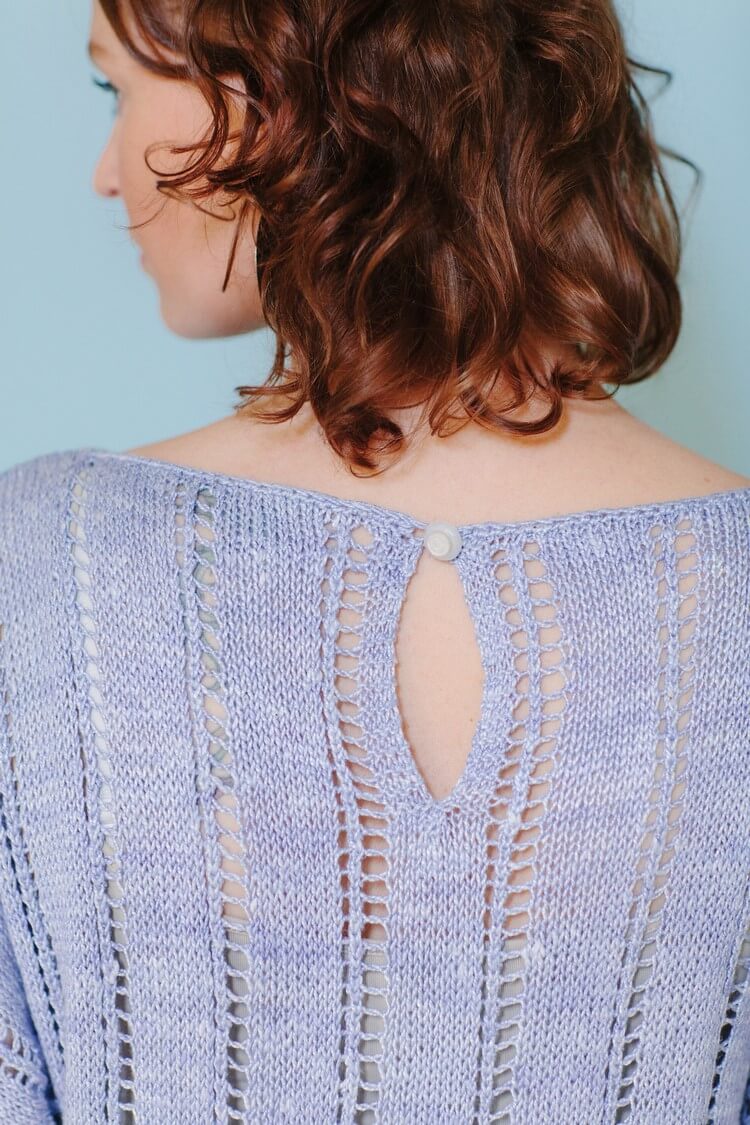
Once I had sketched out a plan for Haven with an asymmetrical lace motif, sloping shoulders, and breezily open sides, the lace swatch started shouting (metaphorically, of course) “Pick me! Pick me!” It would have been cruel to refuse. Not to mention, it’s perfect.

Haven 2 161_KnitsThatBreathe

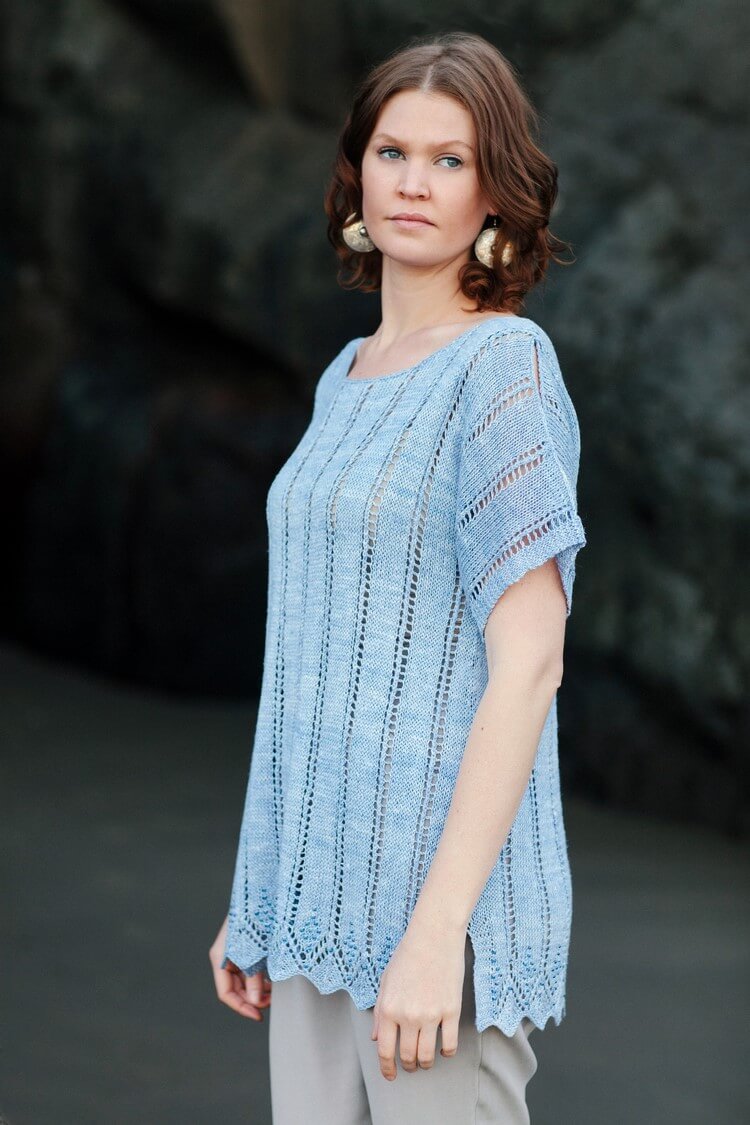
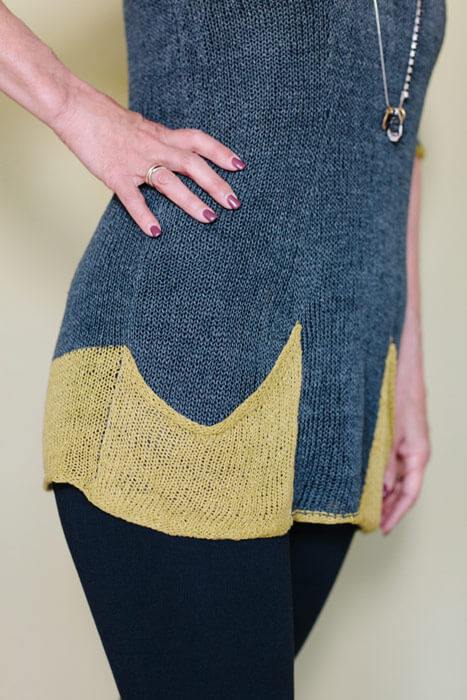
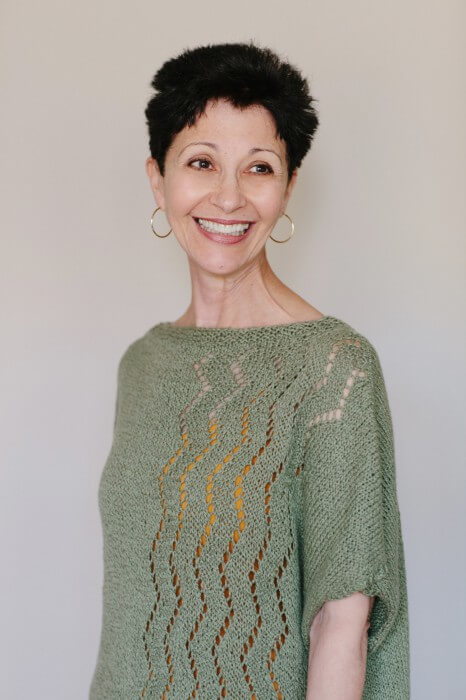
Berroco’s Linsey yarn, a 64% cotton and 36% linen blend that is soft to the touch yet offers wonderful stitch definition is also, as Berroco describes it, “colored in the sun-weathered shades of summertime.” That subtly tweedy color variegation    is part of its appeal.

An additional feature is how marvelously cool it feels against the skin. Cotton and linen are two stalwarts in terms of moisture wicking and absorbency. The linen content gives Linsey’s knitted fabric a judicious hint of the crispness we associate with that fiber, making it truly perfect for a hot day.

Haven 3 164_KnitsThatBreathe

See you at the beach!

Knits That Breathe – Still Waters Tee Project Particulars

For comfort, drape, and quintessential summer style, the Still Waters Tee is easy on the eyes and easy to love. Worked in crisp linen that softens with washing and wear, its strategically placed mesh lace side panels and sleeves give new relevance to the concept of air conditioned clothing.

Still Waters 3 017_KnitsThatBreathe

Knit in the round up to the armholes and then divided for the sleeves, front, and back, Still Waters offers easy construction and visually simple but highly effective texture. Two short seams at the top of the shoulders means that only minimal finishing is required before the tee is ready to wear. And with summer calling, what could be better than that?

Still Waters 2 005_KnitsThatBreathe

I can’t say enough good things about Claudia Hand Painted Yarns “Drama” – 100% Linen yarn. Gorgeous colors (I used Blue Fields for this project), lovely drape tempered by linen’s natural dry texture, and unparalleled stitch definition. As the linen softens with wear, I love this tee even more, and find myself reaching for it often to pair with everything from jeans to a linen skirt. I suspect you will, too!

Still Waters 1 002_KnitsThatBreathe

Knits That Breathe – Sirena Tunic Project Particulars

Silk, lace, and beading… a combination that automatically says “dressy” to me. As embodied in the Sirena tunic, this happy blend of elements results in a flowing top that thrills with understated elegance and special details.

Sirena 1 425_KnitsThatBreathe

Hand Maiden Yarn’s Flaxen, a marriage of 65% silk and 35% linen, offers the knitter the delicious softness and color saturation of silk as well as the crisp stitch definition and subtle texture of linen, resulting in a yarn that glides dreamily through the fingers. The two fibers absorb dye differently, giving Flaxen a lovely semi-solid appearance with depth and quiet variegation. The tunic’s beautiful drape grows softer and more luscious with each washing, making Sirena a classic design that only gets better with time and wear.

The scoop neck and open sleeves (seamed only at the shoulders and at the edges) add as much to its cool appearance as the vertical allover lace.

Sirena 3 051_KnitsThatBreathe

A lovely little vintage mother-of-pearl button closes the keyhole back at the neck.

Sirena 5 067_KnitsThatBreathe

The beaded detail at the hem subtly accentuates the lace border. And if the beads seem like too much of a good thing, knitters should feel free to omit them – the lace points have sufficient appeal to stand on their own.

Sirena 4 064_KnitsThatBreathe

Easing over the hips, Sirena can be worn a multitude of ways; belted or not, over a long floating skirt or sleek silk pants. With simple construction and just enough shaping to make the most of your assets, I hope this tunic will quickly become a staple in your wardrobe.

Sirena 2 433_KnitsThatBreathe

Knits That Breathe – Pacific Coast Tunic Project Particulars

While I await this year’s minuscule (i.e. I could buy myself and a friend fancy coffee drinks, maybe) tax refund, let’s start our discussion of the Knits That Breathe Project Particulars with the Pacific Coast Tunic. This design not only made the cover of the book, but was the first one I designed for it.

knits-that-breathe-bc

I confess to being kind of a geek for garment construction techniques that look rather complicated, but are actually quite straightforward in execution. The Pacific Coast Tunic is a perfect example of this. It’s made of four pieces, but not in the way you might expect.

Raised seams certainly focus the eye on the tunic’s front and back center panels, but they also add wonderfully flattering vertical lines to this garment. That distinction is important because the tunic’s fabric is worked in a stitch pattern that includes subtle, graduated horizontal “stripes,” as you can see below:

Pacific Coast 3 325_KnitsThatBreathe

Short-Row shaping at the hem of the side panels serves two functions; while the curving hem gracefully covers what some wearers might consider a surplus of generous hip, it also provides soft drape and movement with every sway of those hips.

Pacific Coast Tunic Rear Smocking detail

Pacific Coast Tunic Rear Smocking detail

The smocking detail at the top of each center panel is both a stylish detail (and one that calls for some really special buttons!) and a subtle technique to accentuate the A-line shape of the tunic – another way for those important vertical seams to provide flattering lines where we need them the most.

The yarn used in this project is the wonderful Tencel Tape by Prism Yarn. 100% Tencel (a lovely fiber with origins in wood pulp, but definitely no splinters here!), it glides smoothly through the fingers and is a pleasure to work with. Easy to care for, it’s got plenty of shape-holding body AND a soft hand, and absorbs dye well for beautiful color saturation and retention. I can’t recommend it highly enough!

Prism Yarn Tencel Tape

Prism Yarn Tencel Tape

I adore this tunic, and can’t wait to wear it this summer (although after last night’s snowfall and this morning’s temperature of 32 degrees, I’m seriously wondering if summer will ever come to Chicago this year!).

I’ll also wear it with a tissue-weight white tee shirt underneath. When I wore it that way to Chicago’s YarnCon, I couldn’t take ten steps without being stopped by someone asking where she could find the pattern. The good news is, the pattern is in Knits That Breathe, and the book is available for purchase now. Make one of your own and soon you, too, will be getting stopped everywhere you go by knitters wanting to make their own Pacific Coast Tunic.

4/21/2014 – Knits That Breathe – Iced Frappuccino Project Particulars

Time for a detailed look at Iced Frappuccino made from Kolláge’s Milky Whey, one of the most popular designs in Knits That Breathe according to Ravelry. And I can understand why; not only does it share the cooling properties of the book’s other eleven projects, but it has elements of grace and softness that give it an extra-special quality.

Let’s take a closer look at the mesh lace yoke, worked in a simple lace repeat that achieves excellent fit by decreasing towards the neckline, allowing it to settle delicately upon the shoulders:

Iced Frap 1 020_KnitsThatBreathe

A reader who likes to keep the tops of her arms covered asked me if it would be possible to extend the yoke over the shoulders to create cap sleeves, a modification that should work nicely for her without detracting in any way from the design. I think I’d probably make that modification using the Short-Row shaping technique to “build” a curved cap over each shoulder, but there are probably other ways to achieve a similar result.

What do you think?

Notice the subtle waist shaping (below) that defines the figure without clinging, and the lace motif that meanders its way vertically up the body without ever revealing too much. When I found this lace motif in one of my stitch dictionaries, I knew it was right for Iced Frappuccino.

I was on a quest for an undulating and graceful lace design that could easily be memorized, because as much as we knitters like a challenge, there are other times when we want to be able to knit while Downton Abbey, or Scandal, or Game of Thrones is on without fear of losing track of the row or repeat. 

Iced Frap 2 026_KnitsThatBreathe

Have I mentioned how much I loved working with Kolláge Yarn’s Milky Whey? The blend of 50% milk and 50% soy protein fibers feels like the most divine cashmere. And if it feels that good in the skein, just imagine how much softer and more luxurious it feels post-blocking, worn right next to the skin. 

Iced Frap 3 396_KnitsThatBreathe

Milky Whey is the ultimate in heavenly, wearable, and gorgeous-to-knit-with yarn! It is available in a lovely palette of soft pastel shades that are sophisticated rather than childish (my choice of Latte is one of those) as well as a handful of luscious brights. You really can’t go wrong.

4/12/2014

It’s great to be back after a long absence while my site was offline being updated. Now that it’s new and improved, I’m so ready to roll up my sleeves and let the fun begin!

First up is the release of Knits That Breathe: 12 Breezy Projects To Keep You Cool, otherwise known as the book I’ve been working on for the last year. It’s very much a labor of love.

Knits That Breathe

I look forward to sharing the details of each design over the next several weeks. You can pre-order the paperback now on the SHOP page of this site. The bonus? Doing so gets you an instant download of the e-book version for free. There’s something so magical about that word “free,” n’est-ce pas?

back cover image

Short Row Shaping

Short Row Shaping Let’s talk about short rows:  a brilliant shaping solution for things like shirt-tail hems, sleeve caps, bust darts, shawl collars, and curved hat brims. Mastery of Short Row shaping is one of the most important skills a knitter can learn in order to create garments with a truly custom fit. While it’s true that the very sight of the words “Short Row Shaping” in a pattern used to fill me with dread, now there are at least three different methods I use regularly. I’ll share them here, as well as additional resources at the bottom of this page. Let’s dive in.

Traditional Wrap & Turn:

This is the technique you see most often in written patterns. Its main advantage is that it’s nearly invisible in your finished garment. However, it can take a bit of time to master the technique. Here’s how it works:

Right Side/Knit stitch: Work in the established pattern to the first stitch to be wrapped (the turning point). Bring the yarn to the front of the work, slip the next stitch on your left needle to the right needle. Bring the yarn to the back of the work, and slip the stitch you just wrapped back onto the left needle as if to purl. Turn the work. Purl to the end of the row, pulling the wrap snug. To close the gap created by the wrapped stitch, knit to the wrapped stitch, then insert the tip of the right needle into the wrap’s front strand from the bottom, and knit the wrap together with the wrapped stitch. The wrap will naturally shift to the wrong side of the work.

Wrong Side/Purl Stitch: Work in the established pattern to the stitch to be wrapped (the turning point). Slip this stitch to the right needle, bring the yarn to the back of the work, and slip the stitch you just wrapped back onto the left needle. Turn the work, and bring the yarn to the back of the work. Knit to the end of the row, pulling the wrap snug. To close the gap created by the wrapped stitch, purl up to the wrapped stitch, and then insert the tip of the right needle into the wrap’s back leg from the bottom and purl it together with the wrapped stitch. The wrap will naturally shift to the wrong side of the work.

Short Row Shpaing Yarnover Short Rows :

This is a straightforward technique that doesn’t necessitate any finicky moves. Watch your tension using this method, and when working back across the row be sure to snug the yarnover tightly enough when working in larger gauges.

Right Side/Knit Stitch: knit to the turning point. Turn the work, and yarnover before you purl to the end. To close the gap created by the yarnover, knit up to the yarnover and knit it together with the next stitch (k2tog). Knit to the end of the row. The yarnover will be concealed on the wrong side of the work.

Wrong Side/Purl Stitch: purl to the turning point. Turn the work and yarnover before knitting to the end of the row. To close the gap created by the yarnover, purl to the yarnover and then slip the yarnover loop knitwise. Slip the next stitch knitwise, and then transfer both stitches back onto the left hand needle. Purl them together through the back loop before purling to the end of the row. The yarnover will be concealed on the wrong side of the fabric.

Slip-Stitch Short Rows : Worked across a single row with no special maneuvers required, this method is very simple and has the added advantage of eliminating bulk (which makes it a top choice for use with heavier yarns). It appears the same from both sides of the work, but it works best with textured yarns because in smooth fabrics the slipped stitch turning point may be visible.

Right Side/Knit Stitch: Knit to the turning point. Turn the work and slip the first stitch purlwise, holding the yarn in front. Purl to the end of the row, or to the next turning point.

Wrong Side/Purl Stitch: Purl to the turning point. Turn the work and slip the first stitch knitwise, holding the yarn in back. Knit to the end of the row.