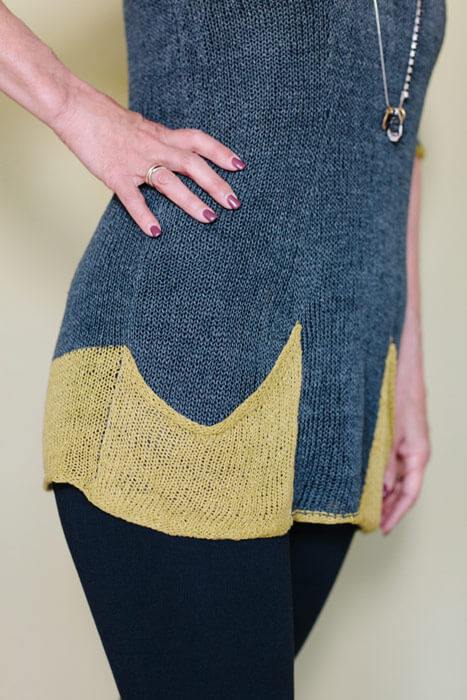
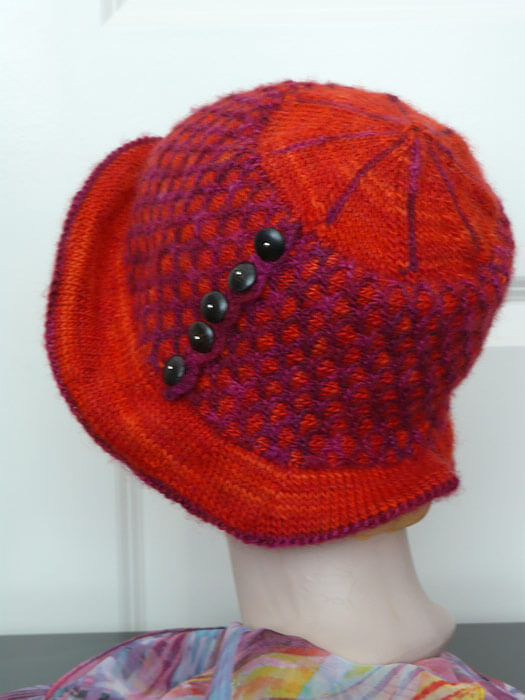
 Let’s talk about short rows: a brilliant shaping solution for things like shirt-tail hems, sleeve caps, bust darts, shawl collars, and curved hat brims. Mastery of Short Row shaping is one of the most important skills a knitter can learn in order to create garments with a truly custom fit. While it’s true that the very sight of the words “Short Row Shaping” in a pattern used to fill me with dread, now there are at least three different methods I use regularly. I’ll share them here, as well as additional resources at the bottom of this page. Let’s dive in.
Traditional Wrap & Turn:
This is the technique you see most often in written patterns. Its main advantage is that it’s nearly invisible in your finished garment. However, it can take a bit of time to master the technique. Here’s how it works:
Right Side/Knit stitch: Work in the established pattern to the first stitch to be wrapped (the turning point). Bring the yarn to the front of the work, slip the next stitch on your left needle to the right needle. Bring the yarn to the back of the work, and slip the stitch you just wrapped back onto the left needle as if to purl. Turn the work. Purl to the end of the row, pulling the wrap snug. To close the gap created by the wrapped stitch, knit to the wrapped stitch, then insert the tip of the right needle into the wrap’s front strand from the bottom, and knit the wrap together with the wrapped stitch. The wrap will naturally shift to the wrong side of the work.
Wrong Side/Purl Stitch: Work in the established pattern to the stitch to be wrapped (the turning point). Slip this stitch to the right needle, bring the yarn to the back of the work, and slip the stitch you just wrapped back onto the left needle. Turn the work, and bring the yarn to the back of the work. Knit to the end of the row, pulling the wrap snug. To close the gap created by the wrapped stitch, purl up to the wrapped stitch, and then insert the tip of the right needle into the wrap’s back leg from the bottom and purl it together with the wrapped stitch. The wrap will naturally shift to the wrong side of the work.
 Yarnover Short Rows
:
Yarnover Short Rows
:
This is a straightforward technique that doesn’t necessitate any finicky moves. Watch your tension using this method, and when working back across the row be sure to snug the yarnover tightly enough when working in larger gauges.
Right Side/Knit Stitch: knit to the turning point. Turn the work, and yarnover before you purl to the end. To close the gap created by the yarnover, knit up to the yarnover and knit it together with the next stitch (k2tog). Knit to the end of the row. The yarnover will be concealed on the wrong side of the work.
Wrong Side/Purl Stitch: purl to the turning point. Turn the work and yarnover before knitting to the end of the row. To close the gap created by the yarnover, purl to the yarnover and then slip the yarnover loop knitwise. Slip the next stitch knitwise, and then transfer both stitches back onto the left hand needle. Purl them together through the back loop before purling to the end of the row. The yarnover will be concealed on the wrong side of the fabric.
Slip-Stitch Short Rows : Worked across a single row with no special maneuvers required, this method is very simple and has the added advantage of eliminating bulk (which makes it a top choice for use with heavier yarns). It appears the same from both sides of the work, but it works best with textured yarns because in smooth fabrics the slipped stitch turning point may be visible.
Right Side/Knit Stitch: Knit to the turning point. Turn the work and slip the first stitch purlwise, holding the yarn in front. Purl to the end of the row, or to the next turning point.
Wrong Side/Purl Stitch: Purl to the turning point. Turn the work and slip the first stitch knitwise, holding the yarn in back. Knit to the end of the row.


Comments welcome